Integrate Keycloak with ASP.NET Core Using OAuth 2.0
Source: Milan Jovanović - Integrate Keycloak with ASP.NET Core Using OAuth 2.0
Date Saved: 2026-02-08
📝 內容摘要
本文詳細介紹了如何在 ASP.NET Core 中整合開源身份驗證解決方案 Keycloak。涵蓋了從使用 Docker 部署 Keycloak、配置 Realm 與 Client,到實作帶有 PKCE 的 OAuth 2.0 授權碼流程(Authorization Code Flow),以及如何在 Swagger UI 中啟用驗證並在後端進行 JWT 權杖校驗。
💡 關鍵重點
- Keycloak 部署:使用 Docker 快速啟動開發環境,並透過 Admin Console 進行管理。
- OAuth 2.0 + PKCE:這是目前瀏覽器應用程式(SPA)最推薦的安全授權流程,能有效防止代碼攔截攻擊。
- Swagger UI 整合:透過
Swashbuckle配置,讓開發者能直接在 Swagger 頁面登入測試受保護的 API。 - JWT 本地校驗:API 伺服器只需在啟動時獲取一次公鑰(JWKS),即可在本地快速驗證 JWT,無需每次請求都詢問 Keycloak,大幅提升效能。
- 生產環境建議:必須啟用 HTTPS、使用持久化資料庫(如 PostgreSQL)以及嚴格的權杖驗證設定。
🚀 Overview
Authentication is one of those things that's easy to get wrong and expensive to fix later. Rolling your own auth system means dealing with password hashing, token management, session handling, and a never-ending stream of security patches.
What if you could outsource all of that to a battle-tested identity provider?
Keycloak is an open-source identity and access management solution. It handles user authentication, authorization, and identity brokering (social logins, enterprise SSO) out of the box. You get a polished admin console, built-in support for OAuth 2.0 and OpenID Connect, and it runs anywhere Docker does.
This guide covers:
- Running Keycloak as a container.
- Setting up a Realm and Client.
- The Authorization Code Flow (with PKCE).
- Configuring Swagger UI with OAuth 2.0.
- Adding JWT Validation in ASP.NET Core.
📦 Running Keycloak as a Container
The fastest way to spin up Keycloak is with Docker. We'll run it in development mode, which disables HTTPS and uses an embedded H2 database. This is perfect for local development but not suitable for production.
Here's a minimal docker-compose.yml:
services:
  keycloak:
    image: quay.io/keycloak/keycloak:26.5.2
    container_name: keycloak
    environment:
      - KC_BOOTSTRAP_ADMIN_USERNAME=admin
      - KC_BOOTSTRAP_ADMIN_PASSWORD=admin
    ports:
      - '8080:8080'
    command: start-dev
Start it with: docker compose up -d
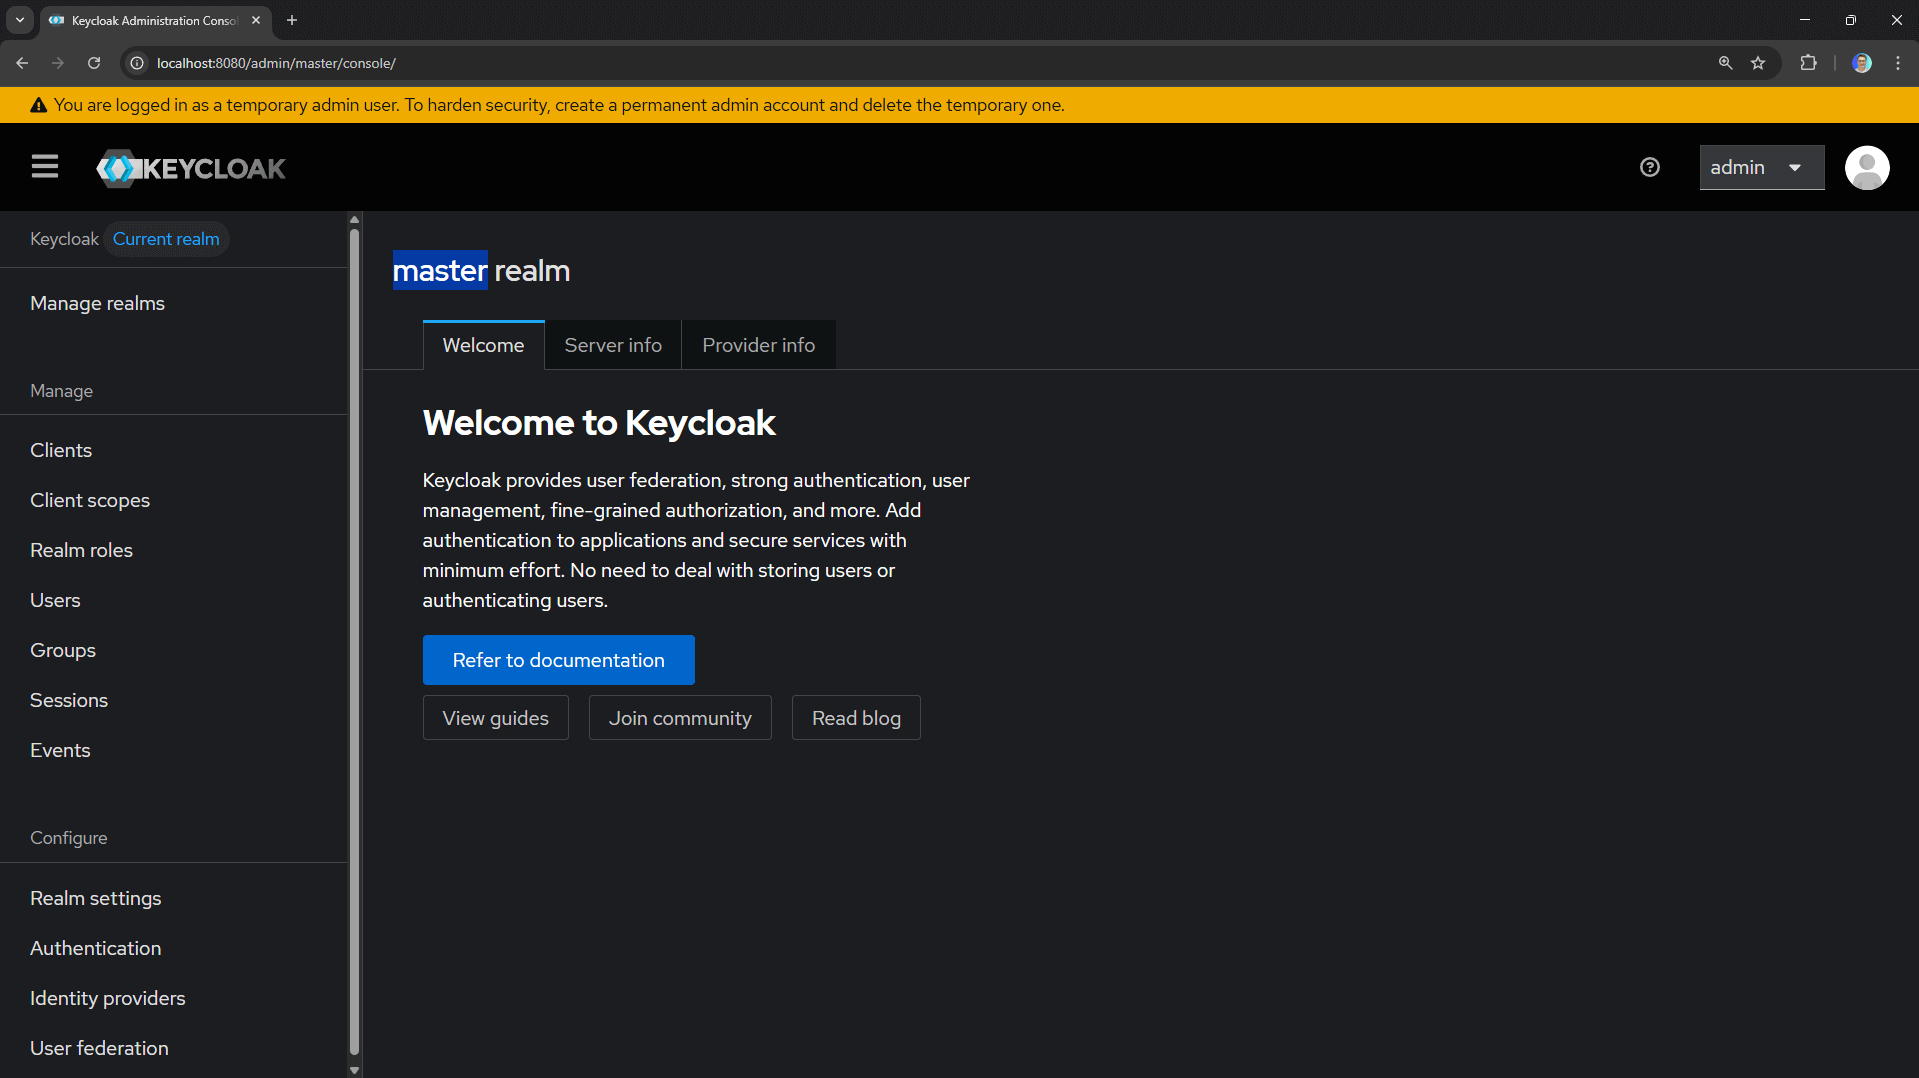
Once Keycloak is running, navigate to http://localhost:8080 and log in with admin / admin.
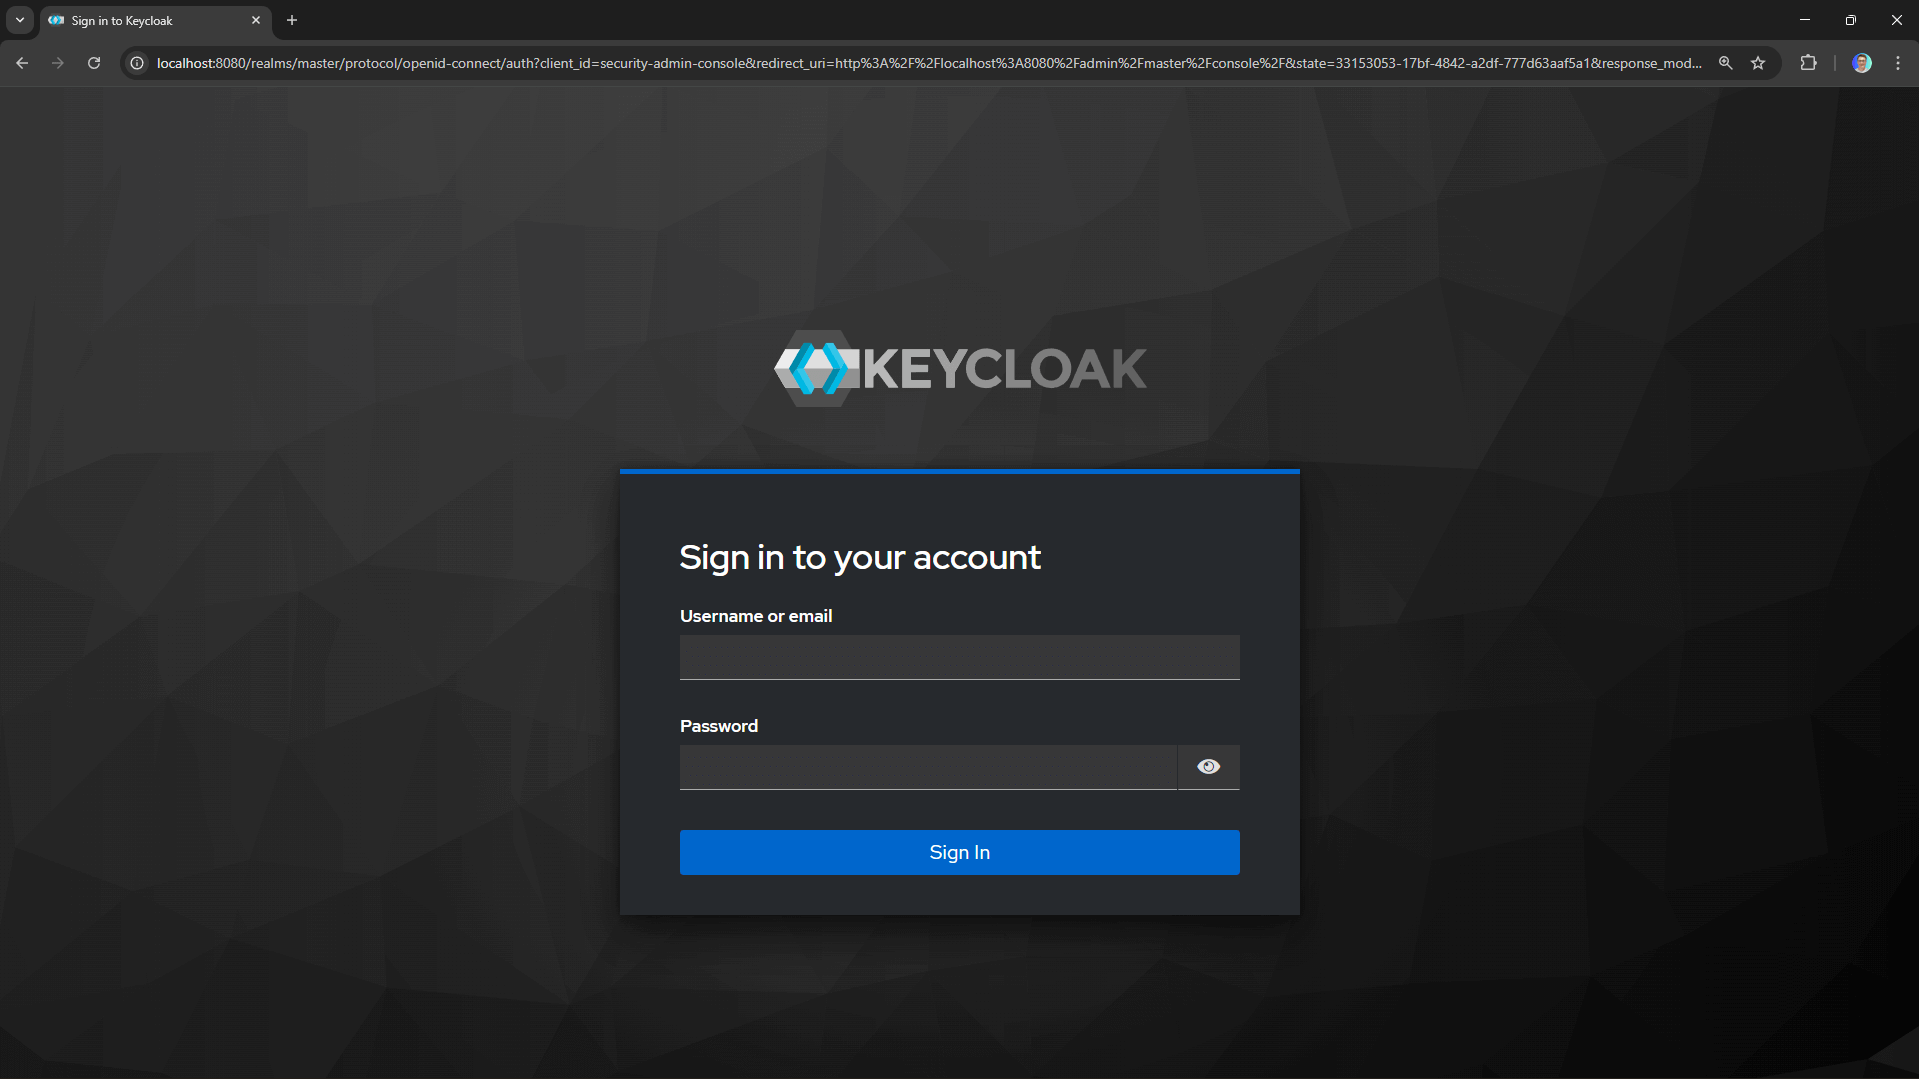
You should see the Keycloak admin console.
⚙️ Setting Up a Realm and Client
Keycloak organizes everything into realms. A realm is a space where you manage users, roles, and applications. The master realm is reserved for Keycloak administration, so we'll create a new one for our application.
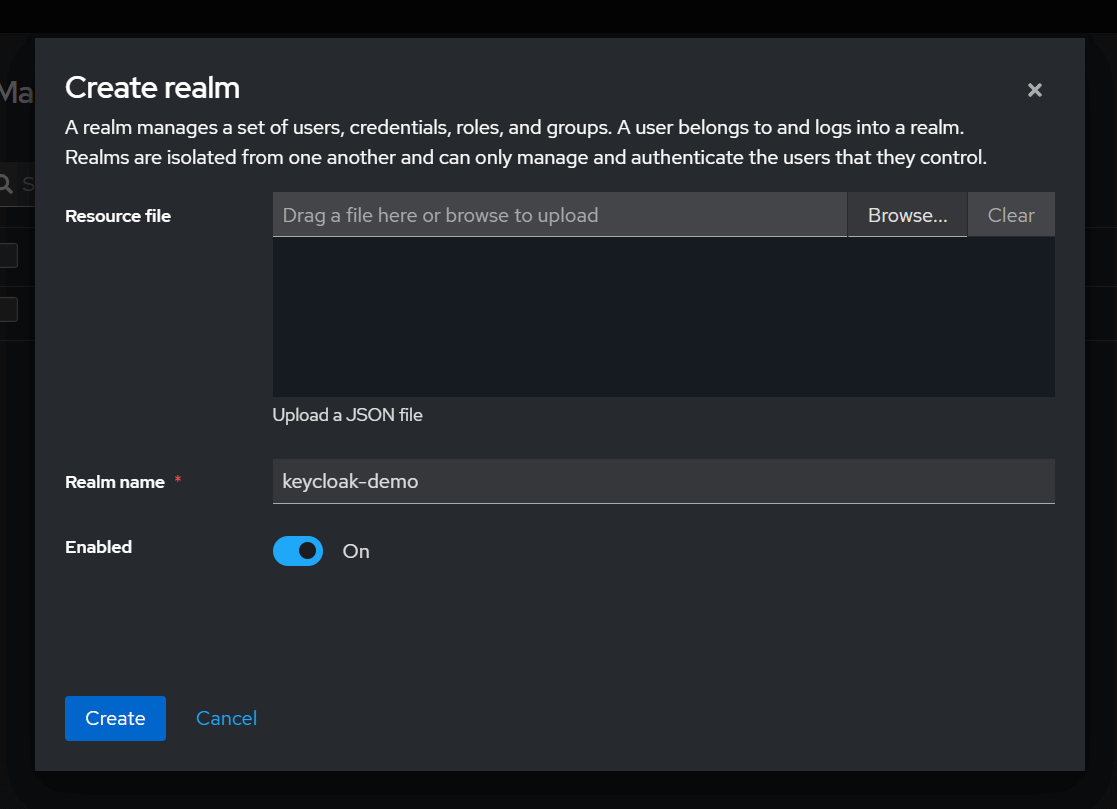
1. Creating a Realm
- Click the Manage Realms button in the top-left corner.
- Click Create realm.
- Enter a name (e.g.,
keycloak-demo) and click Create.
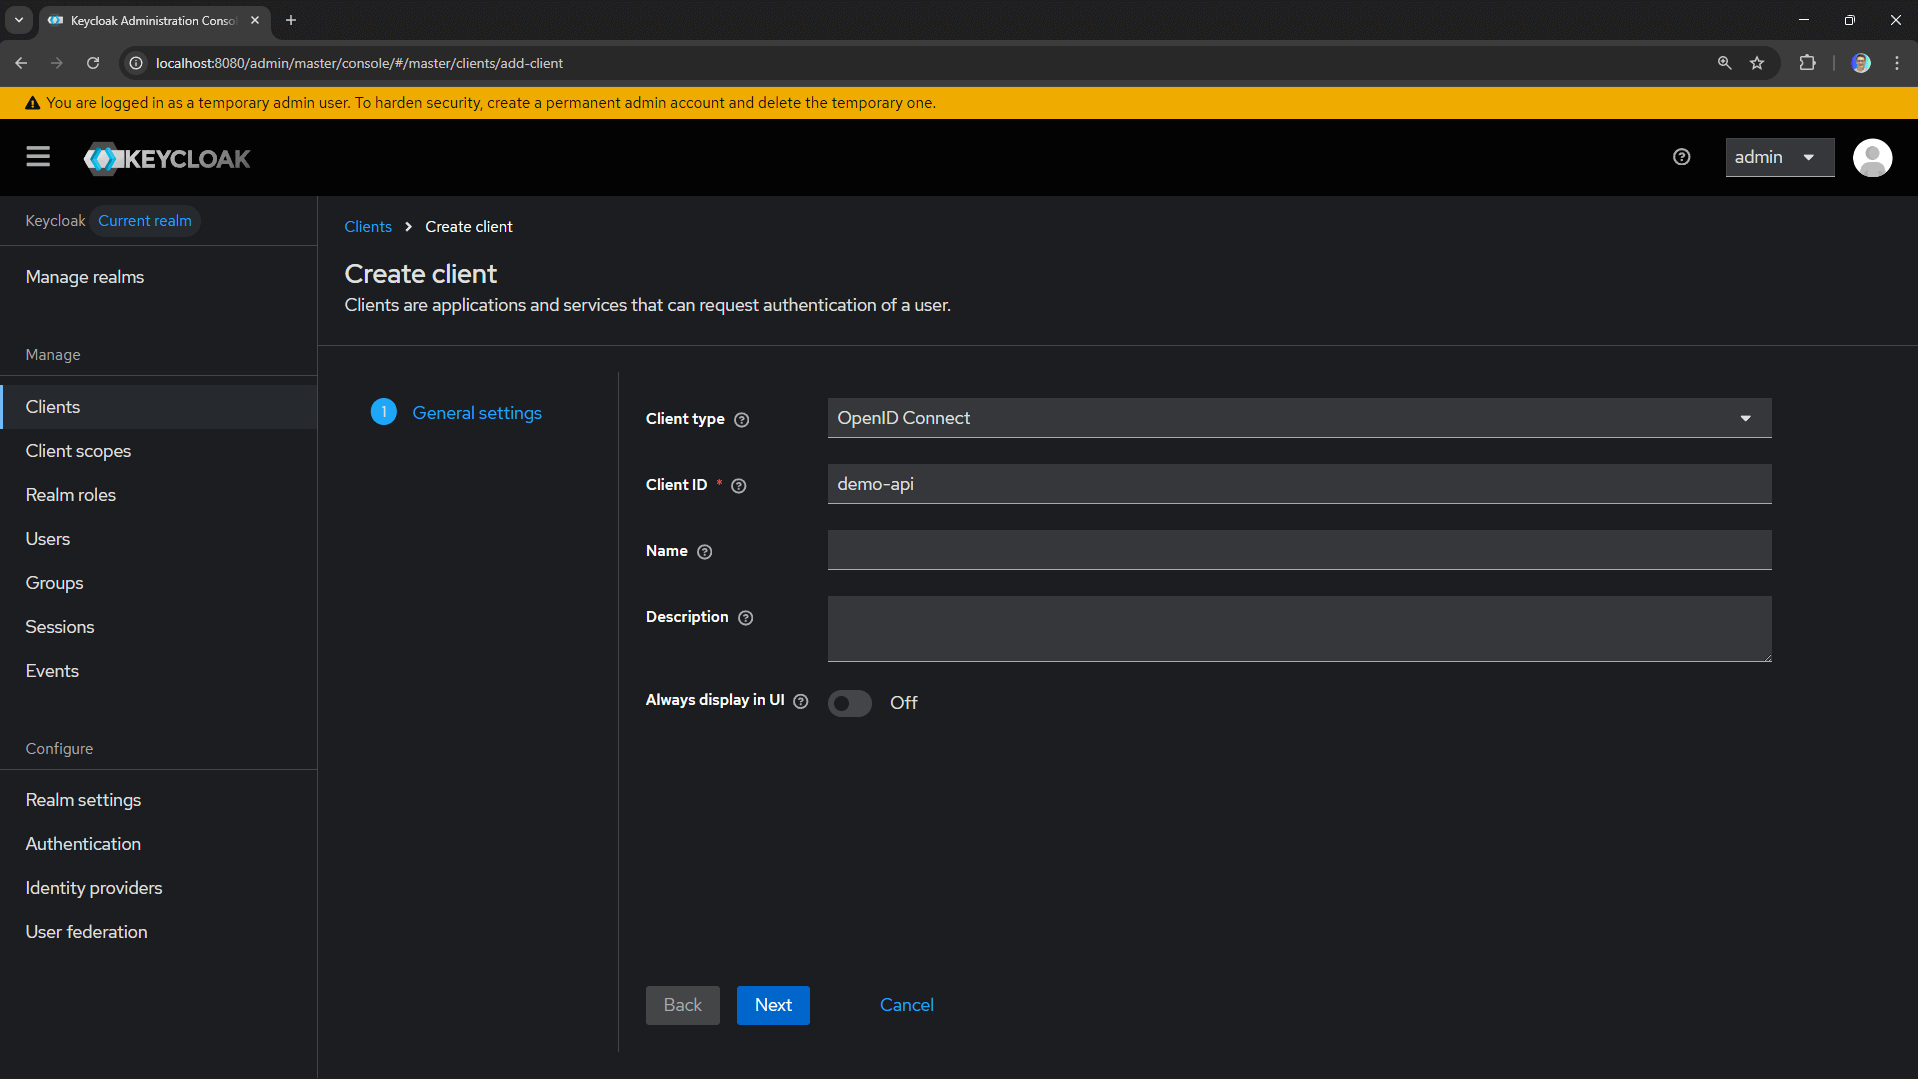
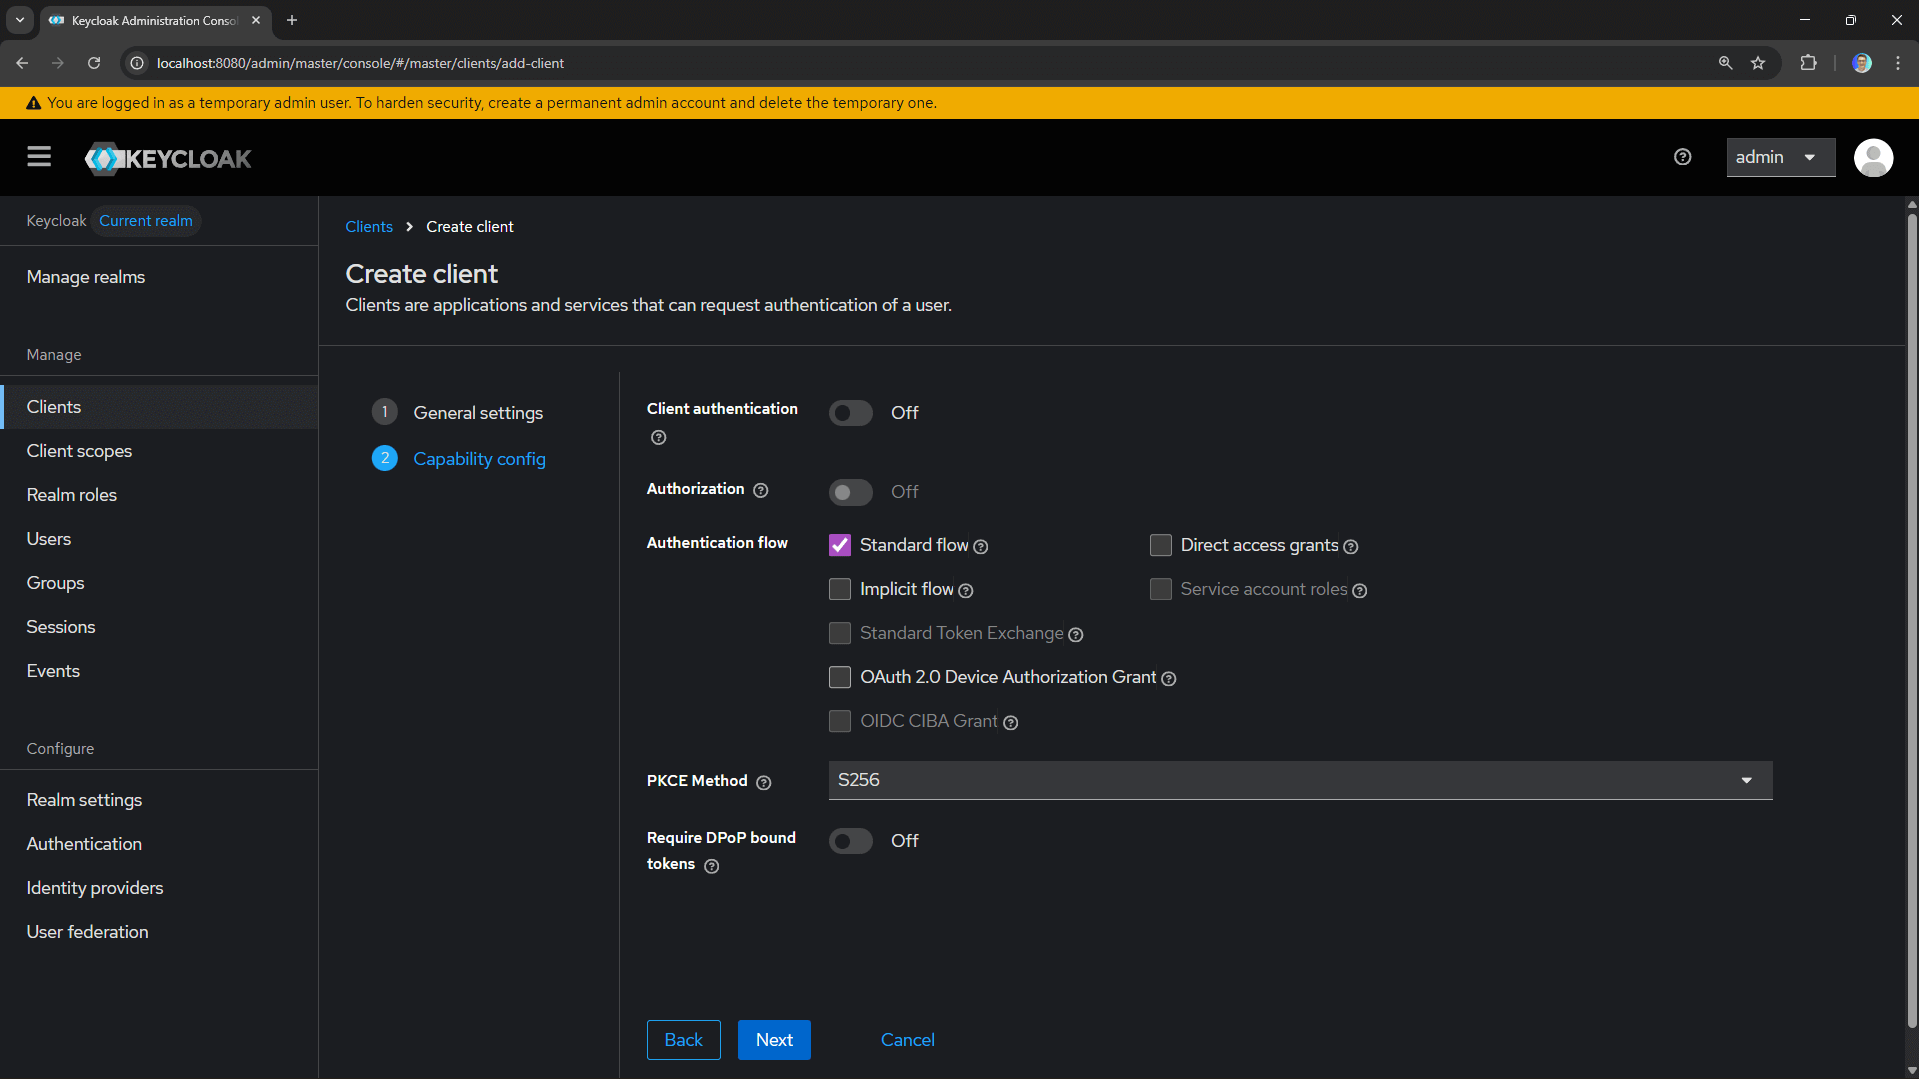
2. Creating a Public Client
Now we need to register our application. In OAuth 2.0 terms, this is a client. Since Swagger UI runs in the browser, we'll create a public client (no client secret).
- Go to Clients → Create client.
- Set Client ID to
demo-api. - Leave Client type as
OpenID Connect. - Click Next.
- Enable Client authentication: Off (public client).
- Check Standard flow (Authorization Code).
- Choose PKCE Method: S256 (SHA-256).
- Click Next.
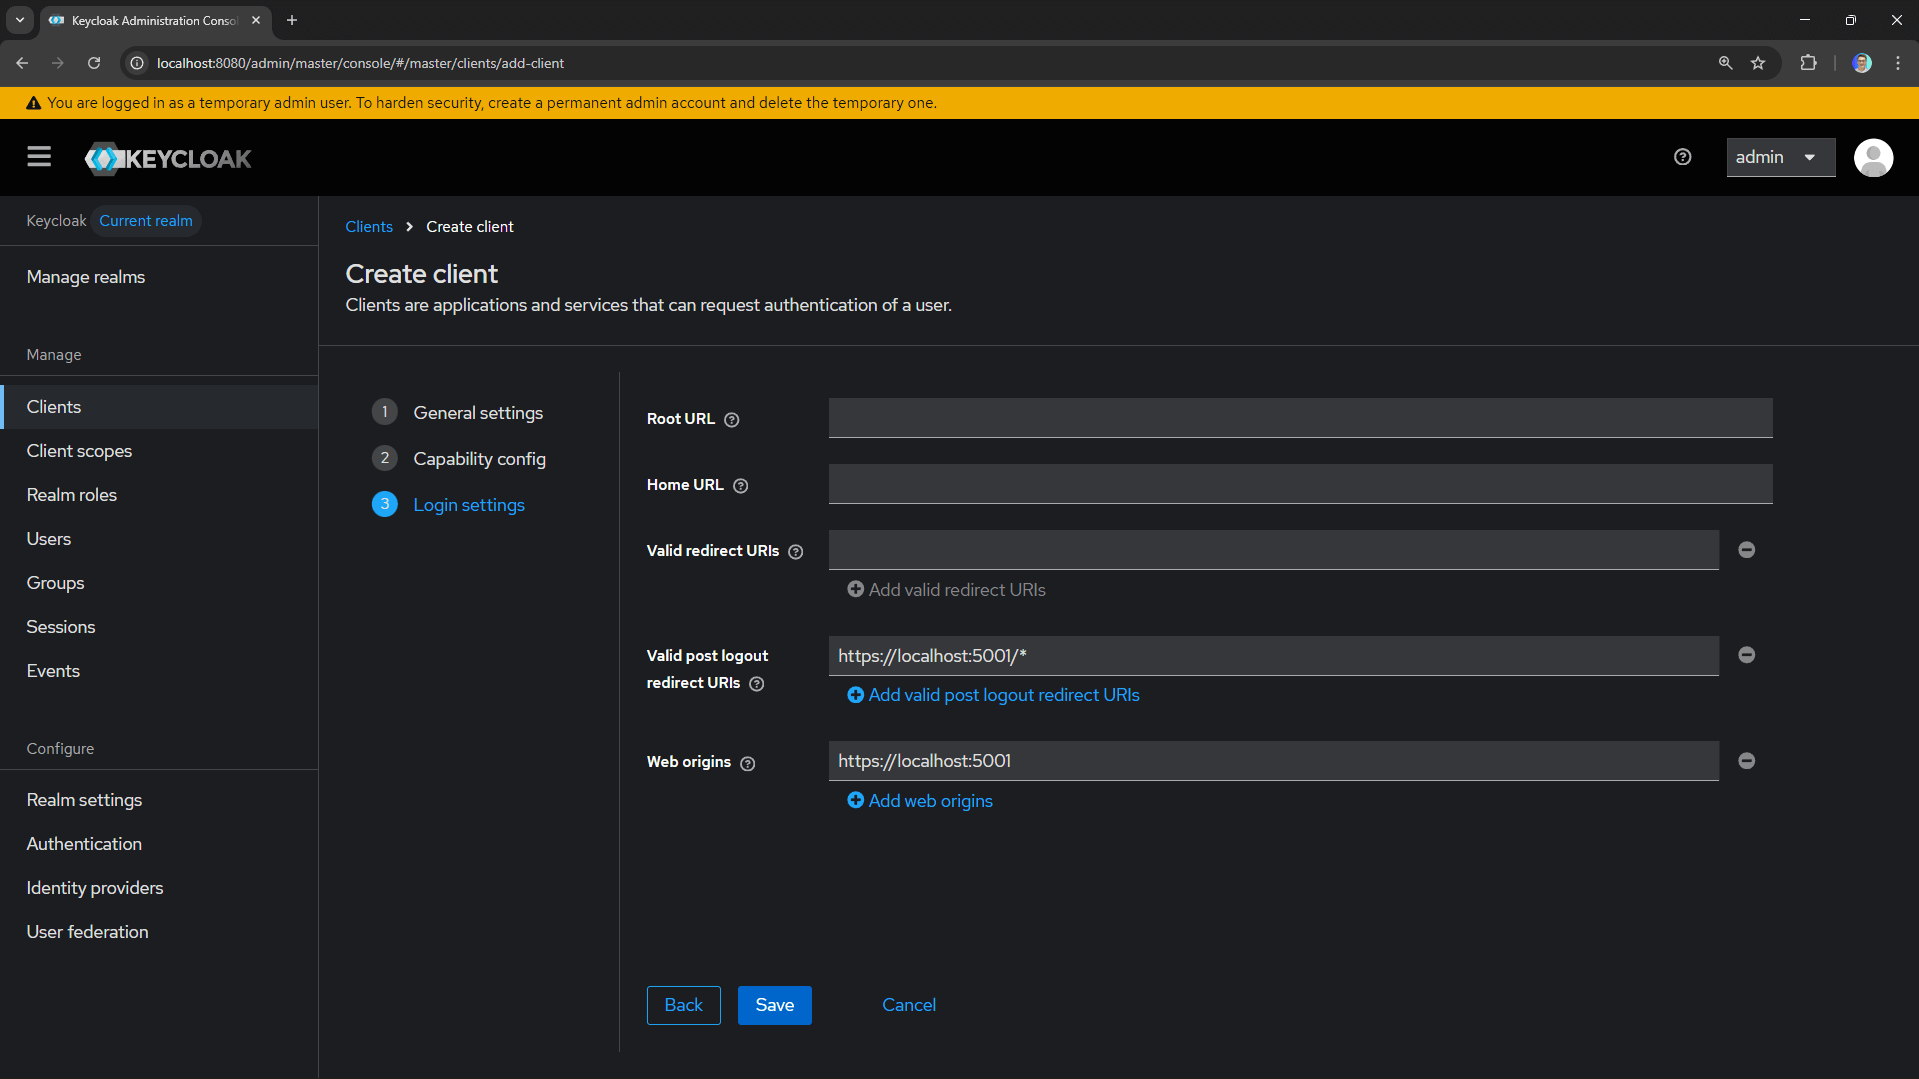
- Configure the redirect URIs:
- Valid redirect URIs:
https://localhost:5001/*(your API's Swagger URL) - Web origins:
https://localhost:5001
- Valid redirect URIs:
- Click Save.
3. Creating a Test User
We need a user to authenticate with.
- Go to Users → Add user.
- Fill in the details (username, email, etc.).
- Leave Email Verified checked.
- Click Create.
- Go to the Credentials tab.
- Click Set password and create a password (disable "Temporary").
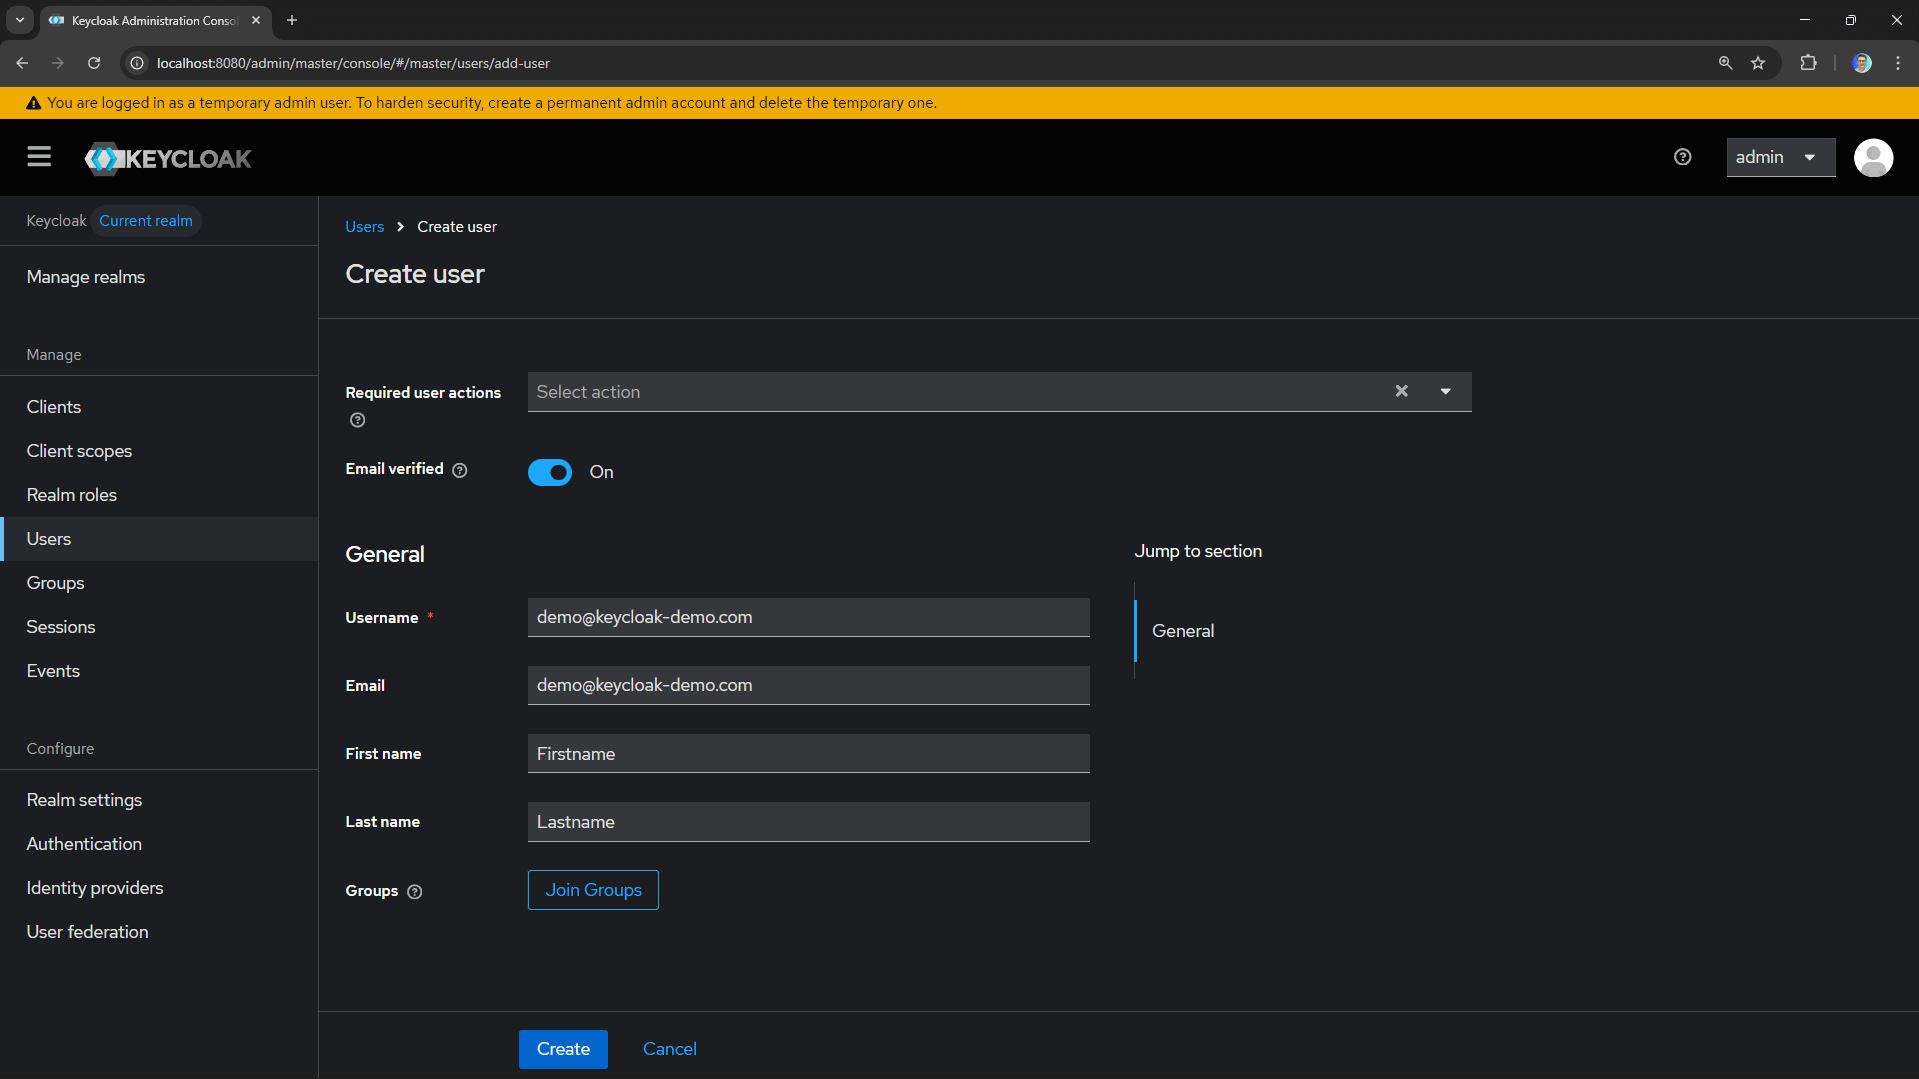
You're now ready to authenticate users against Keycloak!
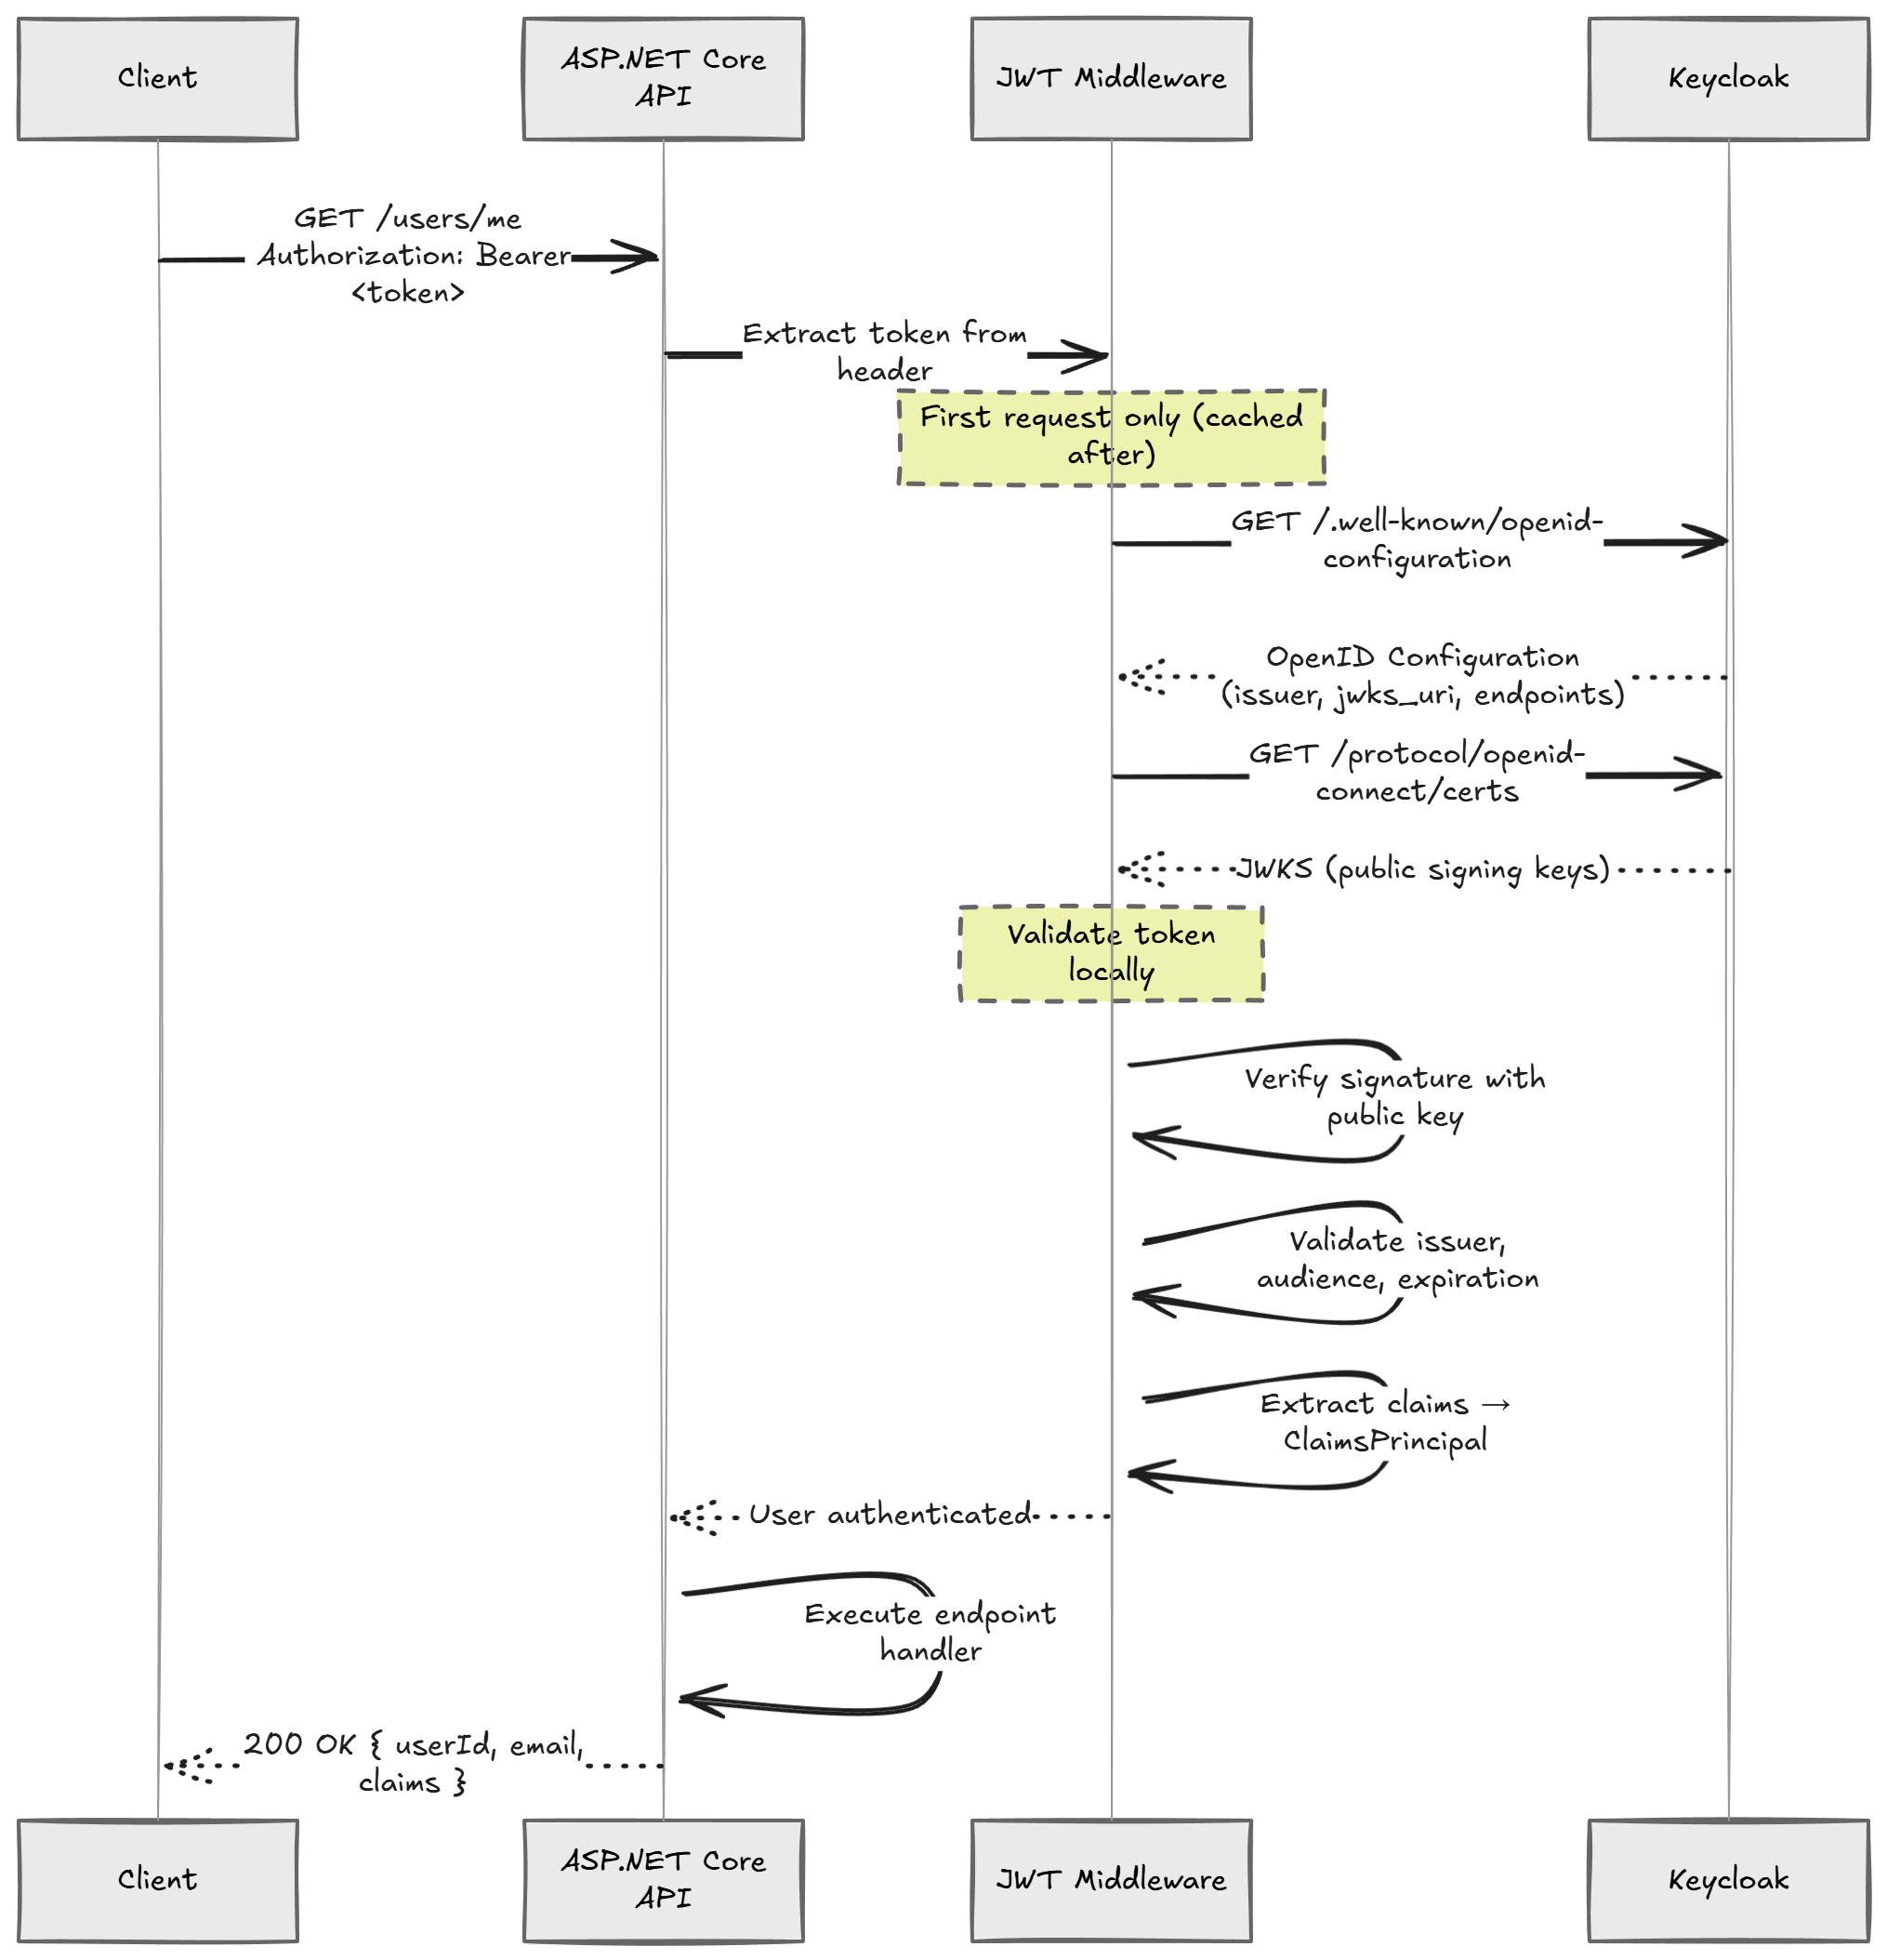
🔄 The Authorization Code Flow
The Authorization Code flow is the recommended OAuth 2.0 flow for browser-based applications.
There's an important security enhancement called PKCE (Proof Key for Code Exchange) that prevents authorization code interception attacks.
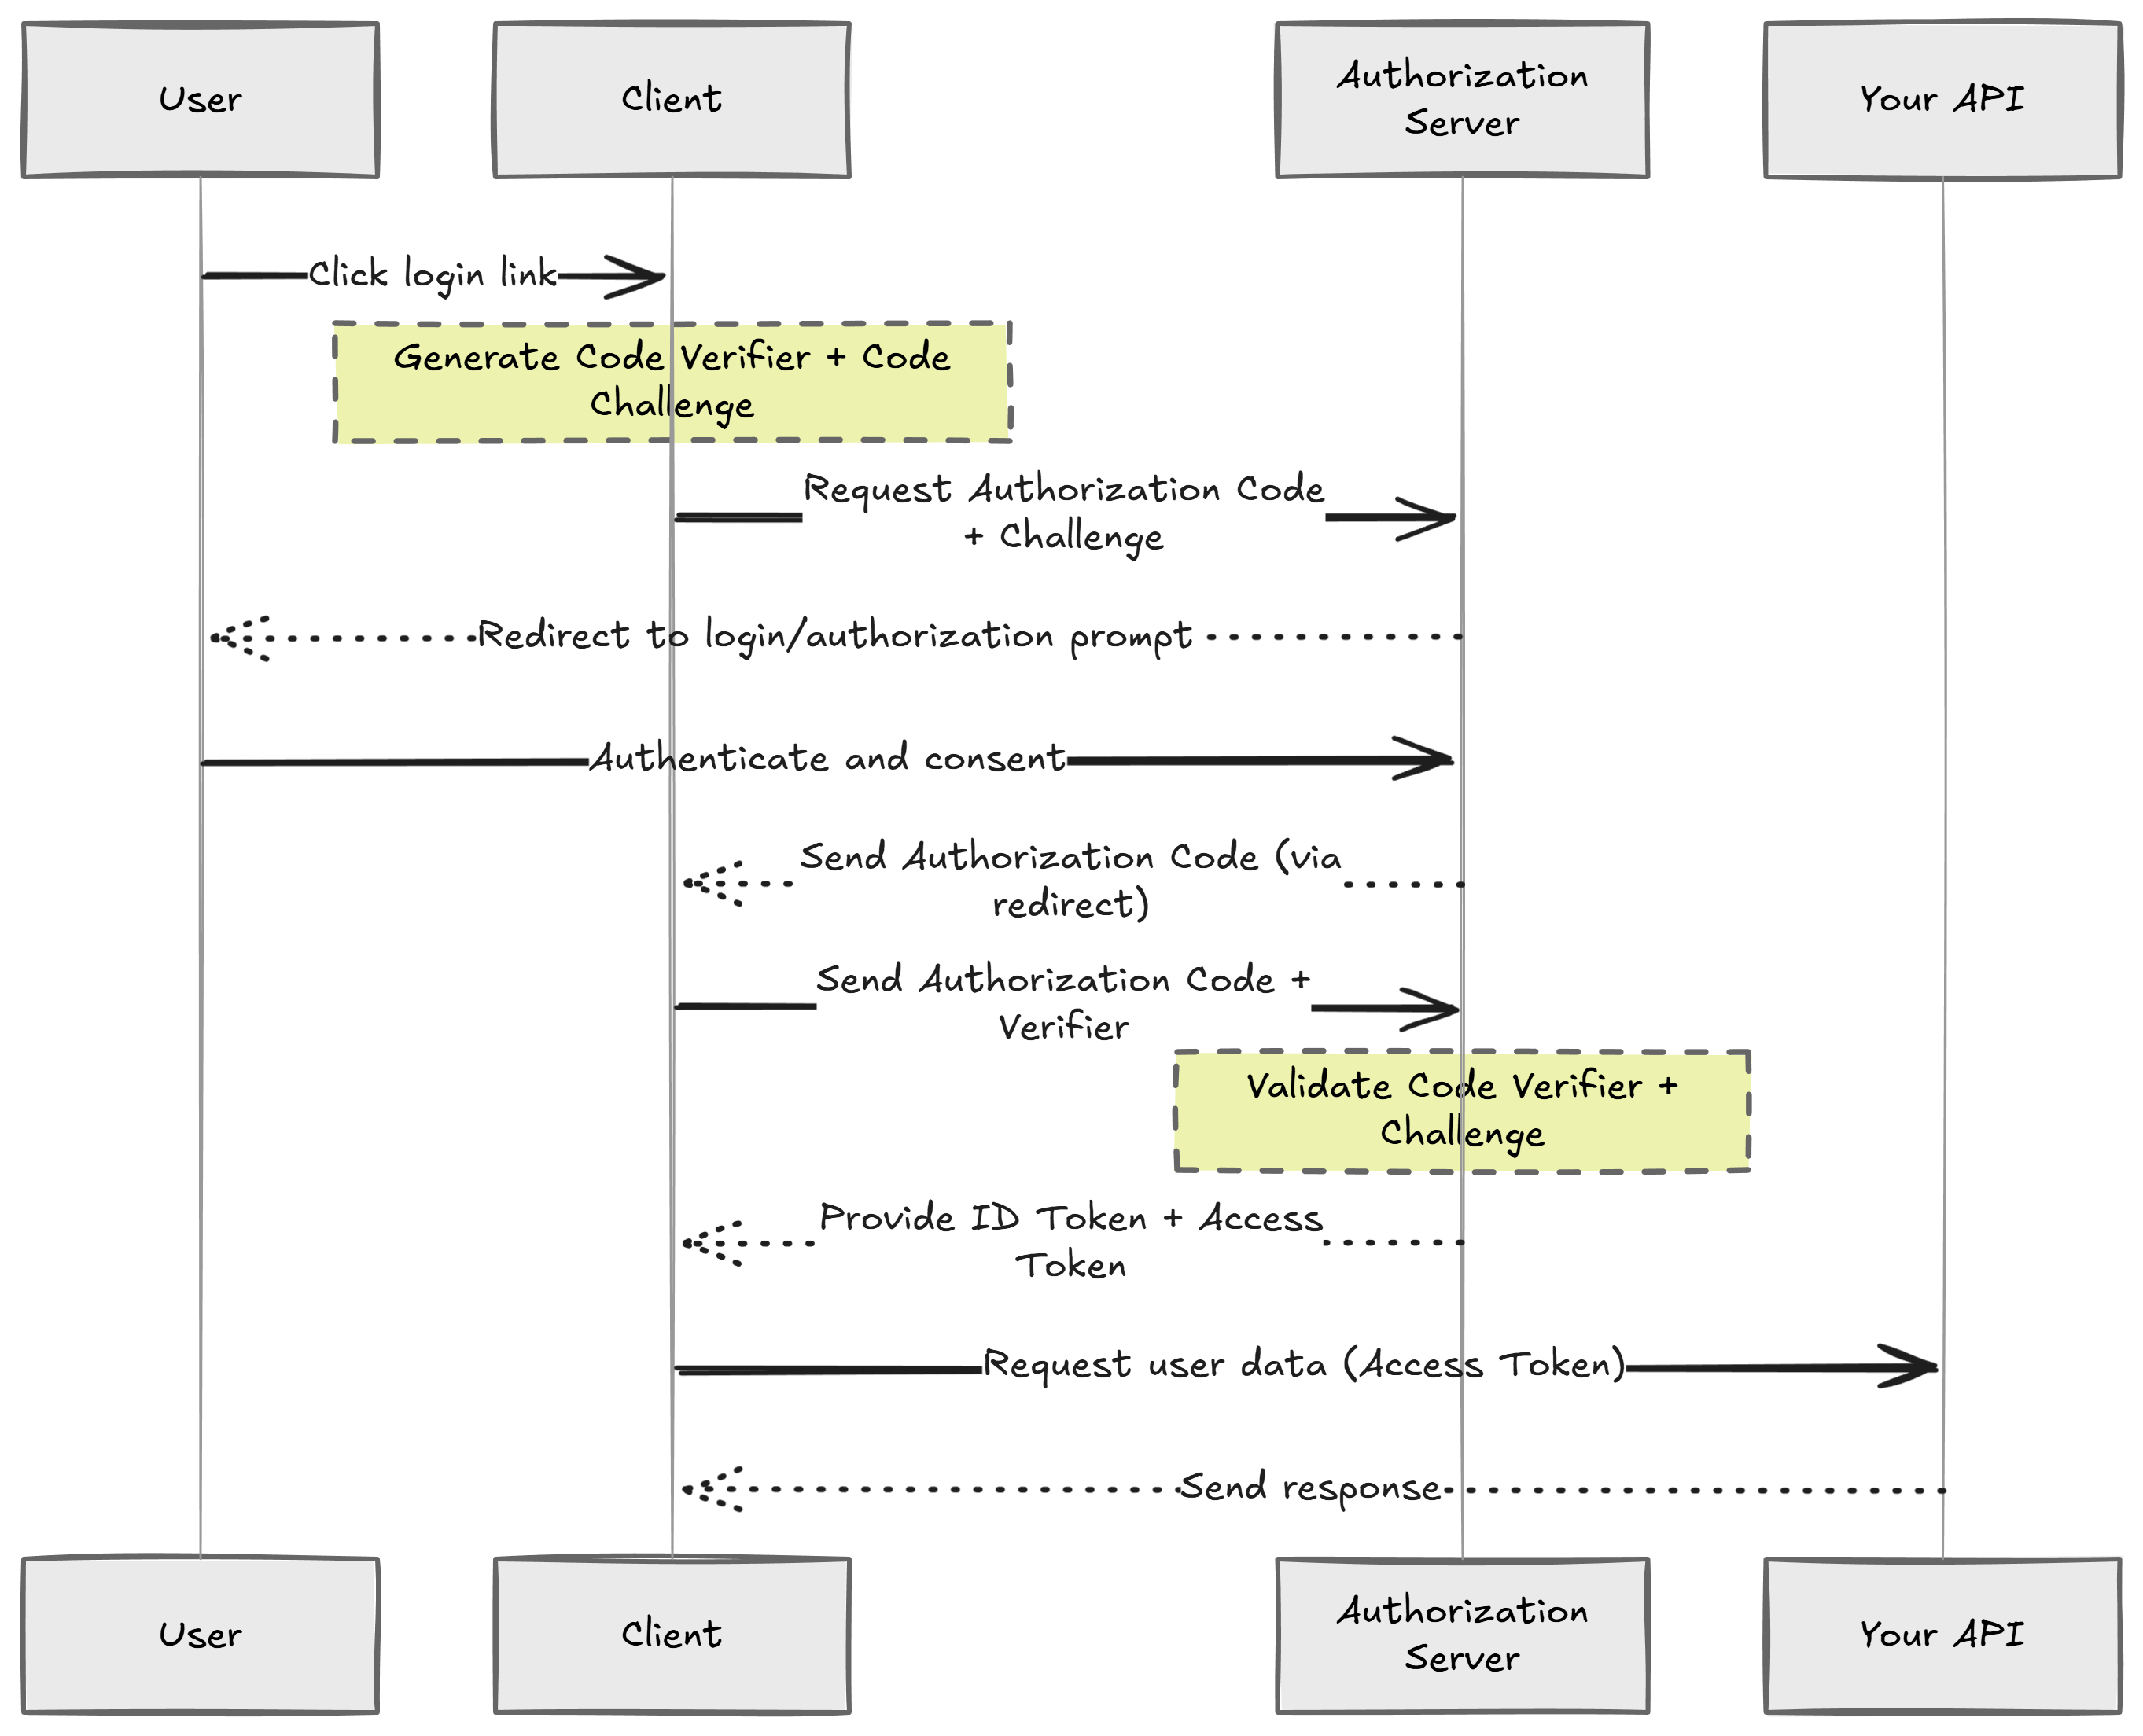
- User clicks "Authorize" in Swagger UI.
- Browser redirects to Keycloak's authorization endpoint.
- User logs in at Keycloak.
- Keycloak redirects back with an authorization code.
- Swagger UI exchanges the code for tokens (access token, refresh token, ID token).
- Swagger UI attaches the access token to API requests.
- API validates the token signature and claims.
🛠️ Configuring Swagger UI with OAuth 2.0
Install the required package:
dotnet add package Swashbuckle.AspNetCore
Configure Swagger in your Program.cs:
var keycloakAuthority = builder.Configuration["Keycloak:Authority"]!;
var keycloakClientId = builder.Configuration["Keycloak:ClientId"]!;

builder.Services.AddEndpointsApiExplorer();
builder.Services.AddSwaggerGen(options =>
{
    options.SwaggerDoc("v1", new OpenApiInfo { Title = "Demo API", Version = "v1" });

    options.AddSecurityDefinition("OAuth2", new OpenApiSecurityScheme
    {
        Type = SecuritySchemeType.OAuth2,
        Flows = new OpenApiOAuthFlows
        {
            AuthorizationCode = new OpenApiOAuthFlow
            {
                AuthorizationUrl = new Uri($"{keycloakAuthority}/protocol/openid-connect/auth"),
                TokenUrl = new Uri($"{keycloakAuthority}/protocol/openid-connect/token"),
                Scopes = new Dictionary<string, string>
                {
                    { "openid", "OpenID Connect scope" },
                    { "profile", "User profile" }
                }
            }
        }
    });

    options.AddSecurityRequirement(new OpenApiSecurityRequirement
    {
        {
            new OpenApiSecuritySchemeReference("OAuth2", options),
            new string[] { }
        }
    });
});

// Middleware
if (app.Environment.IsDevelopment())
{
    app.UseSwagger();
    app.UseSwaggerUI(options =>
    {
        options.OAuthClientId(keycloakClientId);
        options.OAuthUsePkce();
    });
}
appsettings.Development.json:
{
  "Keycloak": {
    "Authority": "http://localhost:8080/realms/keycloak-demo",
    "ClientId": "demo-api",
    "Audience": "account",
    "Issuer": "http://localhost:8080/realms/keycloak-demo",
    "MetadataAddress": "http://keycloak:8080/realms/keycloak-demo/.well-known/openid-configuration"
  }
}
Now when you open Swagger UI, you'll see an Authorize button.

🔐 Adding JWT Validation
Install the authentication package:
dotnet add package Microsoft.AspNetCore.Authentication.JwtBearer
Configure authentication in Program.cs:
builder.Services.AddAuthentication(JwtBearerDefaults.AuthenticationScheme)
    .AddJwtBearer(options =>
    {
        options.MetadataAddress = builder.Configuration["Keycloak:MetadataAddress"]!;
        options.Audience = builder.Configuration["Keycloak:Audience"];
        options.TokenValidationParameters = new TokenValidationParameters
        {
            ValidIssuer = builder.Configuration["Keycloak:Issuer"]
        };
        options.RequireHttpsMetadata = !builder.Environment.IsDevelopment();
    });

builder.Services.AddAuthorization();

app.UseAuthentication();
app.UseAuthorization();
Protected Endpoint:
app.MapGet("users/me", (ClaimsPrincipal user) =>
{
    return Results.Ok(new
    {
        UserId = user.FindFirstValue(ClaimTypes.NameIdentifier),
        Email = user.FindFirstValue(ClaimTypes.Email),
        Name = user.FindFirstValue("preferred_username"),
        Claims = user.Claims.Select(c => new { c.Type, c.Value })
    });
})
.RequireAuthorization();
How JWT Validation Works
When a request hits your protected endpoint, the API never contacts Keycloak to validate individual tokens. It fetches the signing keys once and validates tokens locally. This is why JWT-based authentication is so fast.
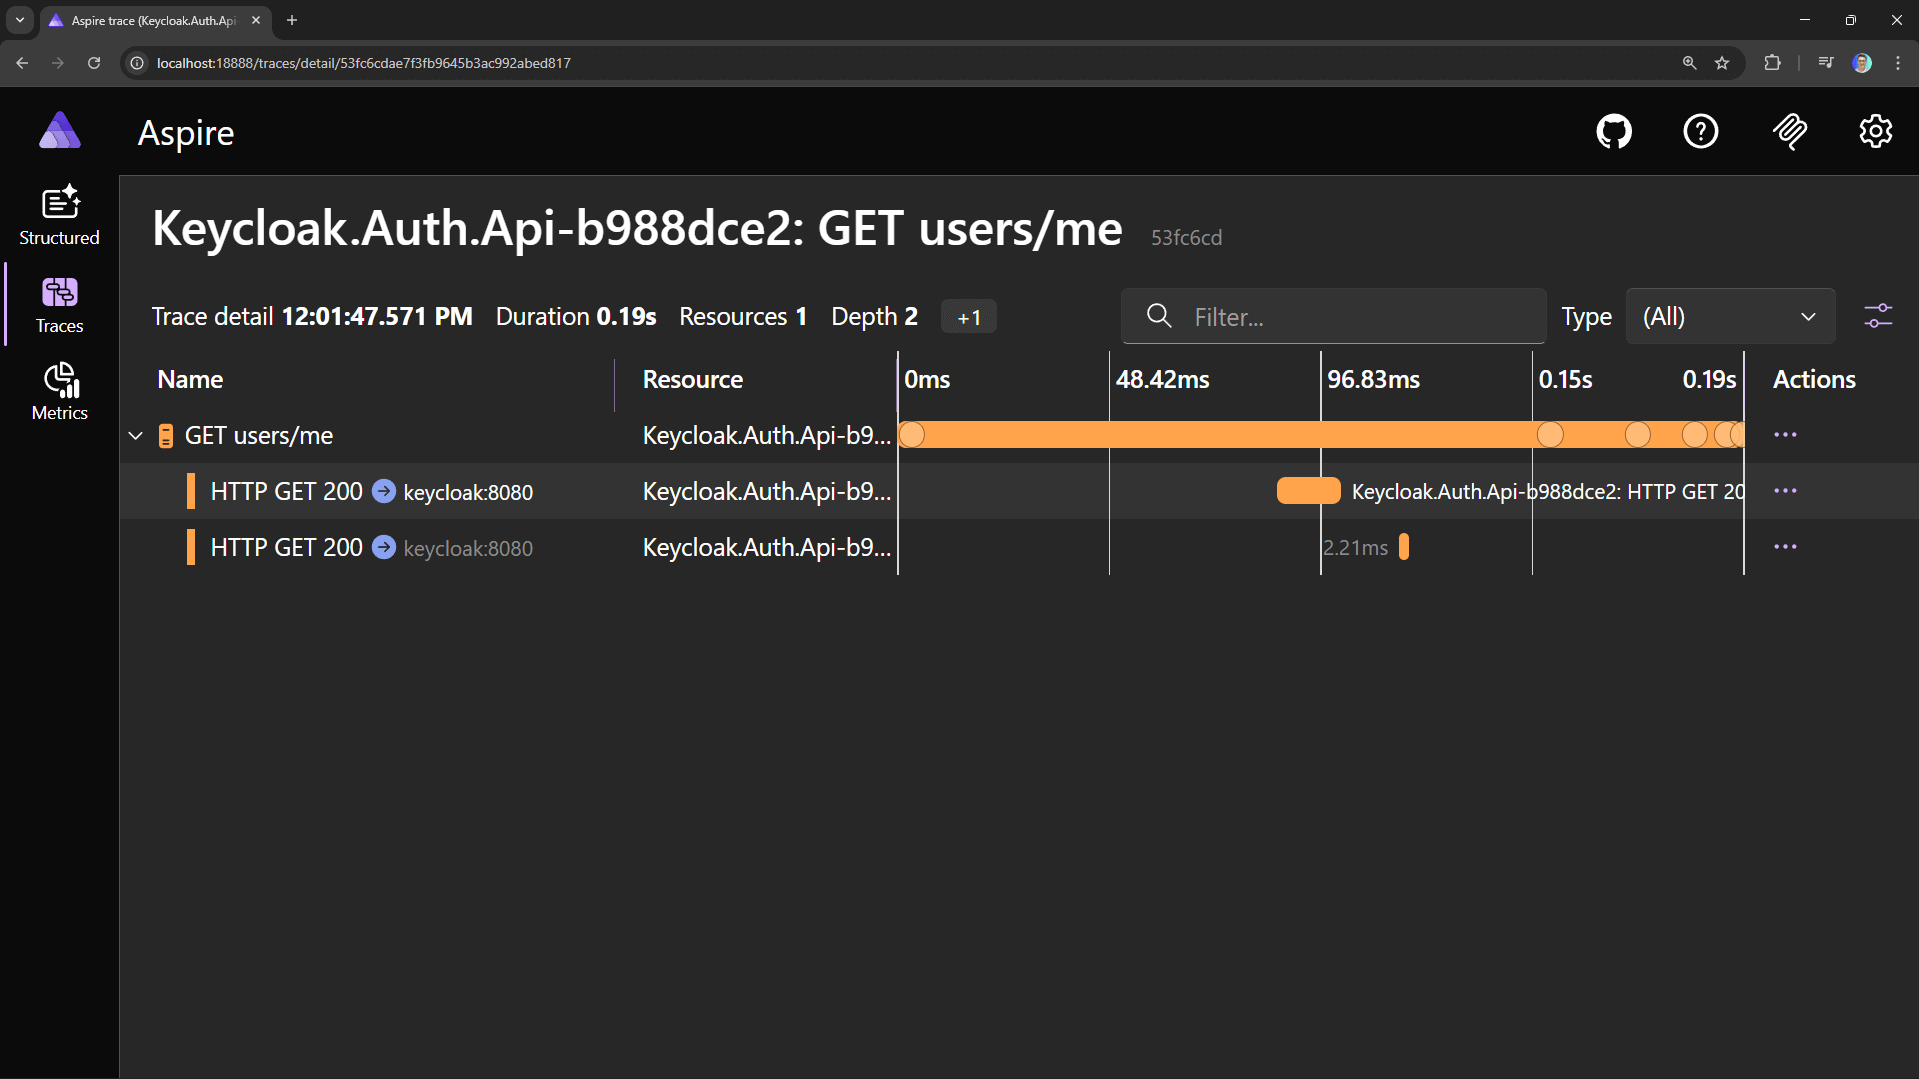
📊 Observing the Flow with Aspire Dashboard
If you're using Aspire, you can observe the entire authentication flow in the distributed traces.
📈 Production Considerations
- HTTPS Everywhere: Keycloak should run behind HTTPS. Set
KC_HOSTNAMEand configure TLS. - Persistent Storage: Replace H2 with PostgreSQL or MySQL.
- Require HTTPS Metadata: Set
options.RequireHttpsMetadata = true.